Feeds:
Posts
Comments

IMG_2582

In my graduate program, we had a handful of students from Seoul, South Korea who had civil servant backgrounds. I served as a “conversation partner” for one of my classmates and quickly became friends with him and his wife. I don’t recall ever tasting kimchi prior to meeting my Korean friends. I had never been to a Korean restaurant and the fermented cabbage dish was not on my radar until Seongmo and his wife, Bora prepared beef bulgogi and kimchi for me to take home to my family in Iowa over Thanksgiving break. I never got the recipe from Bora, but one taste of the spicy, funky, salty, and pickle-y cabbage and I was hooked. I’m a fan of big, bold flavors and you can’t get much bolder than kimchi.

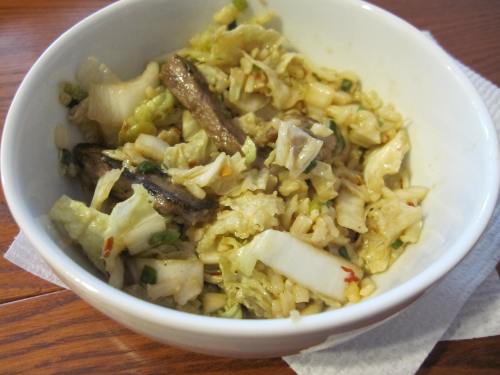
I’ve not made true kimchi before – though I’m eager to try Edward Lee’s recipe in his recent book, Smoke and Pickles, I have made Mark Bittman’s quick approximation of it. The kimchi for this simple stir-fry can be made the day before, instead of months before, doesn’t require hard-to-find ingredients, and still tastes spicy and salty, if not quite as fermented-funky.

Unfortunately my sous chef doesn’t like kimchi (or pickles or eggs). That’s about all he won’t eat so I’m really not that constrained. I love it though, and we recently received a head of napa cabbage in our CSA, as well as sirloin steak, so I made this dish. Chris suffered through about half of his bowl before rounding out his meal with cheese and crackers. I had my fill of kimchi and rice that week.

So here’s the recipe – I recommend making the rice and kimchi the night before you want to eat this – then for dinner all you have to do is quickly stir-fry the beef, then stir-fry the rice and add the kimchi. Easy and delicious, if you are into spicy, pickle-y things, but I still encourage you to befriend someone who knows how to make real kimchi.

Note for vegetarians: if you aren’t into beef, still make the rice and kimchi stir-fry, and serve with a fried egg.

Kimchi Rice with Beef, from The Food Matters Cookbook by Mark Bittman

serves 4

  • 1 small head napa cabbage (about 12 oz), cored and shredded (note my cabbage was closer to 24 oz. I upped the spices a bit and just ended up with a higher kimchi to rice ratio)
  • one bunch (6) green onions, chopped
  • 2 T. minced garlic
  • 1 T. minced ginger
  • 1 T. red chile flakes (I used about 3/4 T. in the hopes of lowering the spice for Chris)
  • 1 T. sugar
  • 2 T. soy sauce
  • 3 T. vegetable oil
  • 8 oz. beef flank or skirt steak (I used sirloin) very thinly sliced
  • 2 c. cooked brown rice

Put the shredded cabbage in a colander and toss it with 2 tablespoons of salt. Let it sit in the sink or over a bowl until it wilts, at least 2 hours. Rinse the cabbage and pat it dry.

Combine the green onions, garlic, ginger, red chile flakes, sugar and soy sauce in a bow or large jar. Toss the spice mixture with the cabbage. Make the kimchi at least a few hours and up to several days before you want to serve it. It will get stronger as it sits.

When the kimchi is ready, put a large, deep skillet over medium-high heat until it begins to smoke. Swirl in 2 tablespoons of vegetable oil and add the beef. Cook about 2 to 3 minutes until it is seared but still pink inside, about 2 to 3 minutes, stirring occasionally. Remove the beef from the skillet and set aside.

Add the remaining 1 tablespoon oil to the skillet. Swirl it around and add the rice, breaking up any clumps and stirring it into the oil. When the rice is added, cook, stirring frequently, until rice is crisp, 3 to 5 minutes. Return beef to pan and add kimchi. Serve hot or at room temperature.
IMG_2576

While we are back to hot and humid weather this week, it’s been kind of a weird summer in Louisville weather-wise. We’ve had a lot of rain and cooler-than-usual temperatures. The sous chef and I have been trying to take advantage of our back deck as much as possible by eating outdoors. What could be better than eating outdoors than eating outdoors with good friends who just moved into the neighborhood?

Chris and I had the good fortune to welcome two good friends into the neighborhood over July 4th weekend. We just bought a house last August and it is difficult to keep yourself well-fed while moving your life from one side of town to another. We invited our friends over for dinner on their moving day to make things a little easier on them and welcome them to the neighborhood.

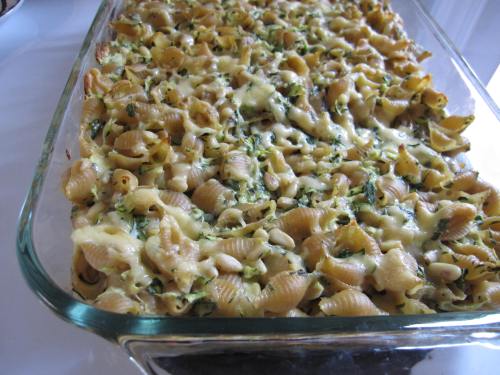
After much deliberation and a trip to the Beechmont Open Air Market, I decided to use some CSA zucchini in this pasta dish. I also made quick, refrigerator pickles, garlic bread, chopped salad, and raspberry-peach crumbles. The pasta was really good and came together pretty quickly. It was not overly heavy – good for a summer evening, but filling, fresh-tasting, and seasonal. he evening was pleasantly warm, the food was great, and the company was even better. Justin and Mal – we couldn’t be happier to have you nearby (and not just just to help us with home repair issues, Justin).

“Baked Shells with Zucchini, Gouda, and Herbs” from from Faith Durand’s Not Your Mother’s Casseroles

Serves 6

  • 1 large zucchini, grated
  • 2 t. salt
  • 1 lb. small or medium pasta shells
  • 2/3 c. pine nuts
  • 1 c. plain yogurt ( I used whole milk)
  • 1 large egg, beaten
  • black pepper
  • 1 1/3 c. grated Gouda cheese
  • small handful of flat-leaf parsley (about 1/4 c.), minced
  • 2 large springs fresh mint (leaves only), minced
  1. Preheat oven to 375 degrees and lightly grease a 9X 13 in. baking dish with olive oil.
  2. Place the grated zucchini in a bowl and stir in the salt. Set aside.
  3. Fill a large pot halfway with water. Salt generously (maybe 1/4 c.) and bring to a boil. Add the pasta and cook for about 2 minutes less than recommended by the package directions. Drain, return to the cooking pot, and set aside to cool slightly.
  4. Heat a small skillet over medium heat and add pine nuts. Cook carefully for  2 to 4 minutes, shaking the pan to keep them from burning. Cook until golden brown. Remove from heat and set aside.
  5. Stir the yogurt and beaten egg together in a small bowl and season well with black pepper. Drain off as much water as possible from grated zucchini and blot dry with a paper towel.
  6. When pasta has cooled slightly, stir in zucchini, pine nuts, yogurt mixture, and about 1 c. of the grated Gouda cheese. Stir in parsley and mint. Spread in the prepared baking dish. Sprinkle the top with remaining cheese.
  7. Bake uncovered for 30 to 35 minutes, or until cheese on top has melted and pasta is lightly golden. Serve.

chicken n quinoa 2

In my last post I promised to provide the quinoa recipe that accompanied the skillet chicken in that same week. Well – one week turned into three. In reality, the last month was pretty crazy. I spent a total of nine and a half days in the office in June. Between May and June, I flew to Charlotte, NC; Des Moines, IA; Chicago; San Diego; and Vancouver. There was also a lovely wedding in Chapel Hill, a milestone birthday party for my sous-chef-for-life, a surprise visit from his parents, and a case of bronchitis. I’m glad things have calmed down a bit.

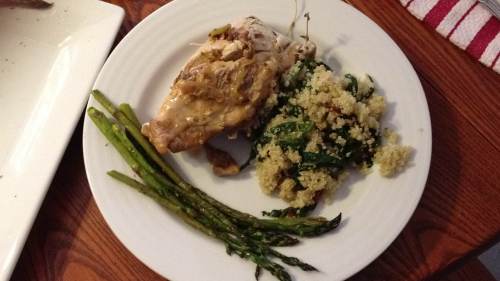
Here’s a great quinoa recipe that makes a tasty side dish to the chicken I posted last time, or a light meal on its own.

Quinoa with Black Pepper, Brown Butter, and Swiss ChardAdapted slightly from “Quniona with Black Pepper, Brown Butter, and Arugula” from Cook This Now, by Melissa Clark

Serves 2-4

  • 1 c. quinoa
  • 2 T. unsalted butter
  • 2 garlic cloves,  minced
  • about 4 oz. swiss chard (4 c.), or another green, like arugula or spinach
  • 3/4 t. kosher salt
  • 1/2 t. ground black pepper

1. Bring a large pot of salted water to a boil. Add quinoa. Cook about 10 to 12 minutes until tender. Drain well.

2. Melt butter in a medium skillet over medium heat. Cook until the butter begins to turn brown, about 2 minutes. At this point it will burn quickly so keep an eye on it. Stir in the garlic and cook for 30 seconds. Add swiss chard (or other green), 1/4 t. salt, and pepper. Cook, tossing until greens are wilted. Stir in quinoa and remaining salt. Serve

chicken n quinoa

One of the things I love about living in Kentucky, as opposed to my home state of Iowa, is that there are four, distinct seasons. Sure, the cold, relentless dampness that seeps into our bones in winter seems never-ending, and the oppressive humidity and heath of summer seems unyielding, but we have the lovely fresh breaths that are spring and fall to break up the misery. Iowa has four seasons too, but the springs and falls are much shorter – the winters much harsher. The summers, harsher than one would expect.

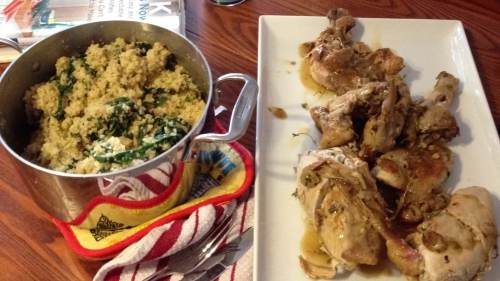
I’d declare this spring a nice one. We had some very pretty sunny days and some rain too. We had some cool evenings, and I had a CSA (yes – still doing that) box full of green garlic and swiss chard. I turned to my favorite cookbook for some seasonal inspiration. With a few minor tweaks the sous-chef and I enjoyed a great spring dinner. I even butchered my own chicken. In this case butchering means cutting a whole chicken into 8-ish pieces – a task that always seemed overly tricky and messy for me. I followed Mark Bittman’s very clear instructions in “How to Cook Everything.” Here’s a video too with clear instructions.

While this recipe relies on spring-like produce, with summer just about in full swing this recipe can be easily adapted. Don’t have green garlic? Use regular garlic. The original recipe calls for lemon thyme but I just plain thyme. Check back later this week for the recipe for the quinoa.

Adapted slightly from “Skillet Chicken with Green Garlic and Lemon Thyme” from Cook This Now, by Melissa Clark

serves 4

  •  1 (3 1/2 lb) chicken, cut into 8 pieces
  • 1 T. extra-virgin olive oil
  • 1 t. kosher salt
  • 1/2 t. black pepper
  • a few sprigs of thyme (lemon thyme if you’ve got it)
  • 1 head of green garlic, thickly sliced (you can use 4 regular cloves of garlic, peeled and smashed)
  • 3/4 c. dry white wine
  • 2 T. unsalted butter

1. In a large dish or bowl, place the chicken, oil, salt, pepper, thyme, and garlic. Mix to coat the chicken. Cover and chill in refrigerator for a few hours or overnight.

2. Heat a large skillet over medium heat. Place the chicken and seasoning mixture. Cook without moving the chicken for 10 minutes. Flip the chicken pieces, cover the pan, and continue cooking with moving for another 15 to 20 minutes.

3. Check the breasts to see if they are completely cooked. If they are, transfer them to a plate and cover with foil to keep warm. If not, keep cooking them for another 5 minutes or so until they are done. I had to cook mine longer.

4. After removing the breasts, spoon out some of the excess fat from the pan. Add the wine and simmer, scraping up brown bits from the bottom of the pan until the sauce reduces and the remaining chicken pieces are completely cooked. Transfer the chicken pieces to a place. Whisk butter into the pan, whisking until it is melted and the sauce has thickened. Serve with the sauce on the chicken with the quinoa – recipe to follow later this week.

lamb tagine

IMG_2530

I documented way back in 2011 how when I have a new ingredient (red spinach in that case), I am compelled to find the perfect recipe, or way to cook or use the food. This has become all the more true as my husband and I continue to get meat and produce from Grasshoppers, our local CSA (Community Supported Agriculture).

Since April 2011, I’ve been getting better about just using what produce we have, trying not to stress too much about finding the best recipe to highlight that ingredient. I’m more flexible with what I cook and how I cook.

Then there was the lamb. We had a boneless leg of local lamb sitting in our freezer, courtesy of Grasshoppers. We don’t receive lamb very often, and it is expensive to purchase at the grocery. I also happen to love lamb. Therefore, I had to find THE RECIPE for this. After much debating, I chose a pretty good one.

I had three recipes to choose from: the enticingly-named “The Best Curry of your Life” from the Amateur Gourmet; another lamb curry from Indian Food Rocks via The Kitchn; and one for a lamb tagine.

The first recipe sounded amazing, but  required some ingredients I did not want to hunt down – kaffir lime leaves, fenugreek, and anise. The second recipe also sounded great but I would have to purchase more curry powders and it required a lot of added fat. The final recipe was the winner – it sounded almost as good as the others and I had more of the ingredients on hand.

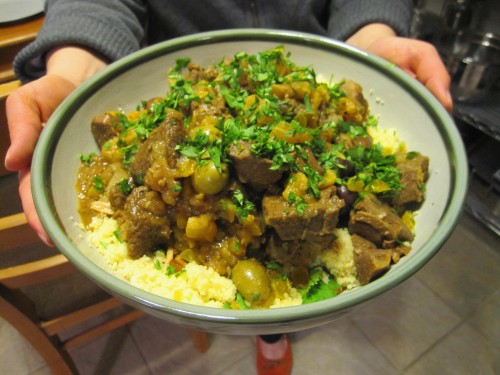
Following Ms. Clark’s recipe carefully yielded delicious results. It took all of 2.5 hours (much of that hands-off), and I dirtied several pans toward the end, but it was a perfect weekend recipe and would be great to serve for a group of friends or family.

The recipe also succeeded in enticing me to buy olives for the first time. Olives are the one food I really can’t stand. They do, however, provide dishes a salty, briny complexity (as do capers and anchovies, both of which I like). I figured I’d go ahead and include the olives but not eat them. They would at least flavor the sauce. I’m glad I did – the sauce was perfectly salty and savory.

Adapted slightly from Lamb Tagine with Apricots, Olives, and Buttered Almonds, by Melissa Clark (also appears in the book In the Kitchen with a Good Appetite)

Serves 6

2 1/4 pounds boneless leg of lamb or lamb stew meat, cut into 2-inch chunks
4 garlic cloves, minced
1 1/2 t. kosher salt
1 t. ground black pepper
1 t. paprika
1 t. ground ginger
1 t. ground cumin
2 large yello onions, peeled and quartered
2 cinnamon sticks, each 2 inches long
Large pinch crumbled saffron
1 1/4 c. dried apricots, sliced
1 cup cracked green olives, pitted and sliced if desired – I left them as is since I was not eating them
2 T. butter
1/3 c. sliced almonds
Cooked couscous, for serving
Chopped parsley or cilantro, for garnish – I used cilantro

Preheat oven to 325 degrees. Trim excess fat off lamb. Put meat in a deep Dutch oven or cast-iron pot with the garlic, salt, black pepper, paprika, ginger and cumin. Rub spices and garlic evenly all over meat.

Thinly slice onions, then mince enough of them to yield 1/2 cup. Add minced onion to pot with lamb; reserve onion slices.

Place pot over high heat and let cook, turning meat on all sides, until spices release their scent, about 3 minutes. You need not brown meat. Add 3 cups water to pot (it should come 3/4 of the way up lamb), along with cinnamon and saffron. Bring to a simmer, then cover pot and transfer to oven. Let braise for 45 minutes.

Turn meat, then top with onion slices. Cover pot and braise for another 45 minutes to an hour, or until lamb is very tender. Use a slotted spoon to transfer meat to a bowl, leaving broth and onions in pot.

Place pot on stove over high heat and add 3/4 cup apricots and the olives. Simmer broth until it reduces by a third and thickens slightly, about 10 minutes. Return lamb to pot and keep warm until serving. (Tagine can be prepared 4 days ahead; chill, then remove fat and reheat before serving.)

To serve, chop remaining 1/2 cup apricot slices. In a small skillet, melt butter. Add almonds and cook until well browned and toasted, about 2 minutes. Put couscous in a serving bowl and top with almonds and butter and chopped apricots. Pile tagine in center of couscous and garnish with herbs.

Image

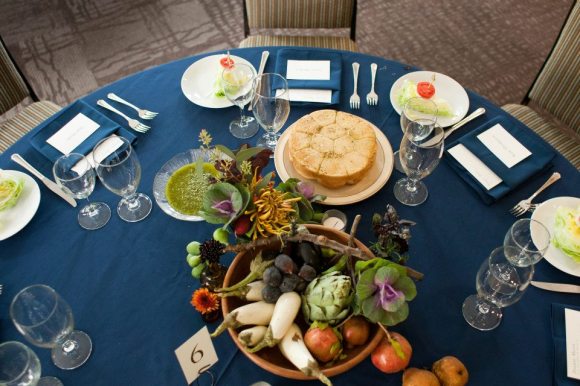
A picture from our wedding reception.
© Derek Poore – Table design by Jaclyn Journey – Catering by Mirabelle.

The last year was a pretty major one. I bought a house with the cheese-grater extraordinaire, and we got married. Between packing up our only recently merged life and planning a wedding, blogging was at the bottom of my to-do list.

But 2013 is a new year. While making a list of household goals inspired by Apartment Therapy’s January cure, I started thinking about other goals for the year ahead. This is a short list and includes setting a budget with my sous-chef for life, and to keep up my blog.

I don’t have a cooking experience to share today, but I’m instead presenting a list of recipes that have caught my eye over the last year that I want to make soon. By the way readers, how do you save recipes you see online? I try to either star them in my blog reader, or email them to myself. Sometimes I forget to include the link though… So here’s a list of things I hope to cook in 2013 – maybe you will be inspired to try some too.

North End Cafe’s Eggplant Casserole and Spicy Lentils, from the Courier Journal. I love the Wednesday edition of the Courier-Journal because it includes the food and dining section, which includes reader-requested recipes from area restaurants. I love the North End Cafe for it’s eclectic, tasty menu for breakfast, lunch, and dinner. The Eggplant casserole is my favorite thing to order at the restaurant and is one of my favorite dishes in the city. It is reliably comforting, spicy, and hearty. I was thrilled to see the recipe printed. The Courier also printed one of my requests for a recipe I submitted last year for El Mundo’s spicy black bean dip. I will be making this soon.

In the winter, sometimes I struggle to figure out ways to incorporate fresh fruit into my normal breakfast routines like oatmeal, peanut butter toast, and yogurt. In the summer, it’s easy to top yogurt and with berries and easy to top toast with apples and pears in the fall. This recipe for Winter Citrus Compote for Yogurt or Oatmeal looks like a great way to use citrus fruit as a breakfast topper.

I’ve been wanting to make Snobby Joes – or meat-free sloppy joes for a while. Maybe 2013 will be the year.

I haven’t made biscotti since I tried it one Christmas break when I was in college. I followed a pretty basic recipe for anise-scented biscotti. I don’t like black licorice and did not realize until after I made the cookies that anise tastes like black licorice. This recipe for Cranberry-Pistachio Biscotti looks more promising for my tastes.

Spicy Lentil Wraps with Tahini Sauce – this looks like a great recipe for make-ahead lunches.

We have some CSA beef filets in our freezer. I’d like to make this.

I love this post on making your own birthday cake. I’d like to try making my own birthday cake this year.

I will report back as I check things off my “to-cook” list.

Have a healthy and happy 2013.

I’ve been eating a lot of salad lately. Inspired both by this post about eating interesting salads every day for lunch, and a general desire to make sure I’m eating plenty of vegetables (and not letting our CSA vegetables go to waste). In the last few months, I’ve been roasting our CSA veggies, particularly squash, sweet potatoes, carrots, and turnips, then layering them in a salad with a little dressing, cheese, and whatever greens I have around. Sometimes I’ll roast the vegetables in barbecue sauce and then pair it with cilantro, cheddar cheese, and a creamy dressing. Other times I’ll roast the veggies with olive oil and salt and pepper and mix with feta, and a drizzle of lemon and olive oil. Either way I end up with a versatile lunch that is filling yet light enough so I don’t feel sleepy afterward. There’s also limitless possibilities for lunch.

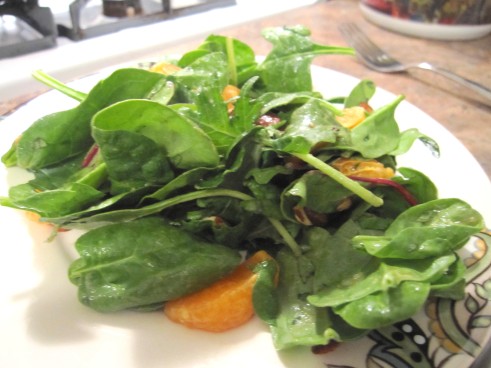
I’ve also been trying to have more interesting side salads at dinner besides a bag of lettuce and a bottle of dressing. Chris and I had a friend over for dinner last weekend. I prepared a rather involved CSA-supplied dinner of glazed lamb ribs with a yogurt mint sauce. I planned to serve salad with just balsamic vinaigrette when I remembered a recipe from my current favorite cookbook, Cook this Now by Melissa Clark. I cracked open the book and miraculously, had all of the ingredients – the salad was done in minutes.

The recipe calls for a dressing made of lemon juice, clementine juice, salt, pepper and brown butter. You can substitute olive oil – which I did that night. You then toss some greens, chopped mint, segmented clementines, and toasted almonds together with the dressing and the result is a light, juicy, very flavorful, entirely addictive salad. After I made it for our guest, I proceeded to make it three nights in a row, and continue to crave it.

Melissa Clark divided her cookbook by months and this salad falls in March – and clementines are readily available now – so make this while you can. Also – I’ve made this without the mint and it was still great. And while I preferred the brown butter version of the dressing, Chris preferred the olive oil version.

I followed Melissa Clark’s recipe closely – only using a little less of the olive oil and butter – I used 2 tablespoons instead of 3. I hope you make this soon and enjoy it as much as we have – with butter or olive oil.

“Butter Lettuce and Clementine Salad with Brown Butter Vinaigrette” from Cook this Now by Melissa Clark

for the vinaigrette:

2 (or 3) T. unsalted butter or olive oil

finely grated zest of one clementine

juice of one clementine, or about 1 1/2 T.

1 T. lemon juice

1/4 t. kosher salt

fresh ground black pepper to taste

for the salad:

1 head butter leaf lettuce (or other lettuce – I used a mix of spinach and spring greens) – torn into bite-size pieces

2 clementines, peeled, segmented, and segments cut in half cross-wise (just realized I forgot to cut the segments in half – still turned out well)

2 T. toasted almonds

2 T. chopped fresh mint

First make the dressing. If using the butter – melt the butter in a small skillet over medium-low heat. Cook gently for about 5 minutes, or until it turns brown. Watch carefully to make sure it doesn’t burn. Immediately pour into a bowl and let cool a bit while you prep the rest of the salad. When the butter has cooled a few minutes, whisk in the clementine and lemon juice, salt and pepper.

In a large bowl combine the lettuce, clementines, almonds and mint. Toss well with the dressing.

Hi again. I have to confess, wedding planning took over my life for a while – as much as I did not think it would (or hoped it wouldn’t) – it did. Between work and planning, my life has become boring. Luckily, wedding-planning has calmed down a bit, and I’m still cooking – and receiving the produce CSA share weekly and the meat share every two weeks. Our recent pick-ups have included lamb ribs, steaks, brats, and some really great chicken wings we cooked for the super bowl a month ago. The produce has included hydroponic lettuce and tomatoes, various herbs, lots and lots of carrots and squash, and some excellent canned and dry goods, like wheatberries, black beans, apple butter, and salsa. Chris and I are still very happy with it.

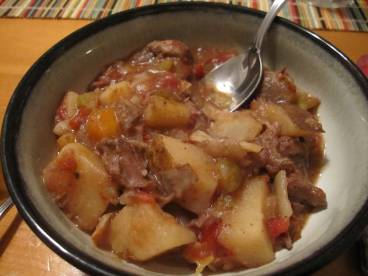
Lately for meals, I’ve been focusing on making one or two dishes each week that will reheat well, and then making salads for lunches with various leftovers and roasted vegetables. One dish that reheats very well, and is perfect for this weird mix of wet and cold (when it isn’t warm, humid, and tormado-filled), late-winter’s evening, is this oven stew.

I’m not sure of the exact origin of this recipe – I received it from my mom, who I think received it from my dad’s mom… or something like that.  It couldn’t be easier to throw together and is filled with chunks of slow-cooked beef and veggies with just salt and black pepper for seasonings. If you are going to be home for a while, you can cook it in the oven. Or you can cook it in your crock pot. You will end up with delicious results either way.

Because this cooks for so long, it doesn’t matter too much how big or small you cut your veggies. I’ve cut them into irregular chunks and everything still cooks well. So if you are in a hurry (before letting your meal stew for 5 hours), just chop up the veggies however you want and throw them all in the pot. You really can’t mess this up too much.

1 1/2 lb cubed beef

2 or 3 stalks celery, chopped

6 carrots, cut into chunks

1 onion, chopped

4 potatoes, cut into similar-sized chunks as the carrot

1 T. sugar

1 1/2 t. salt

1/2 t. pepper

2 T. tapioca

1 15 oz. can diced tomatoes.

Combine everything in a dutch oven, or large, oven-proof pan with a lid, and bake covered for 5 hours at 300 degrees.

Add 1/2 cup white wine before serving.

That’s it – Enjoy!

spiced pork carnitas

Welcome back readers – and happy 2012! I hope everyone had an enjoyable and restful holiday season – if restful was possible during that time of year.

My holiday was a whirlwind. I spent five days home in Iowa, where I celebrated Christmas with my family, and five days in Louisana, were I attended the wedding of Chris’s cousin in Baton Rouge and celebrated New Year’s in New Orleans. It was a wonderful introduction to Louisiana that included gumbo served with potato salad (a common practice – I was told), beignets and au laits at Cafe DuMonde, a celebratory hurricane shared with my newly-minted fiance at Pat O’Briens on New Year’s Eve, a sazerac at the Swizzle Stick Bar, a New Year’s Eve jazz brunch at Commander’s Palace (one of the many highlights of the trip), and a New Year’s day feast, made by Chris’s mother, of black-eyed peas, smothered cabbage and corned beef, crab dip, meatballs, and many, many desserts. It was a hearty and delicious spread that topped off a delicious week. I returned to Louisville wanting more vegetables and fruit, but also craving more po boys and gumbo.

And if you didn’t catch my news above – Chris and I are engaged! This happened New Year’s Eve along the Mississippi River in New Orleans. I was shocked and surprised before total happiness set in. Looks like I’m stuck with my cheese-grater-sous-chef-dish-washer-love-of-my-life for a while.

Anyway – I promise not to turn this food blog into a wedding blog, so on to the recipe.

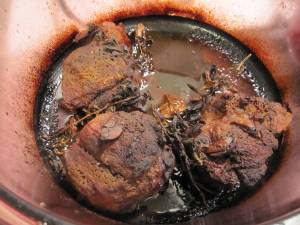
I’ve talked before about how much I enjoy consuming pork tacos. I love them. I’ve made these spiced oven carnitas twice now – and both resulted in slightly different dishes. The first time I made it was for my family when I was home in Iowa last November for my grandmother’s funeral. My mom had a large pork roast in the freezer of unknown origin. I made it and probably didn’t salt it enough. The tacos were very tasty, but not as good as the slow-cooked pork tacos that I called the best dish I’d ever made.

I made them a second time on a busy weekend in December when I had to work and wanted to use up a pork shoulder from our CSA crowding the freezer. I made sure to use enough salt and the pork was high quality, locally raised pork. It was delicious. The kind of delicious where you stand over the pan nibbling and can’t stop.  This is a winning recipe that is pretty easy and cooks largely unattended. If you make this, I recommend using good quality pork. If you don’t eat meat that often, like Chris and me, it is easier to afford better cuts of meat less often.

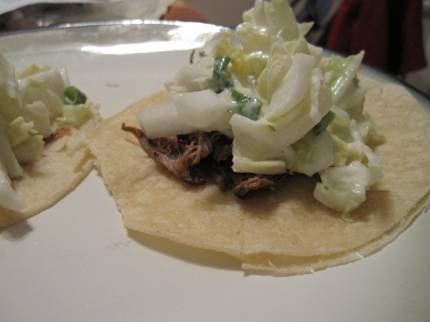
They reheat well and are great with corn tortillas, cabbage slaw, and salsa (or guacamole, sour cream, etc.). I hope you enjoy these as much as we did.

“spiced oven carnitas” from Not Your Mother’s Casseroles by Faith Durand

serves about 8

5 to 6 pound pork shoulder roast (also called butt roast)

salt and pepper

1/4 c. olive  oil

1/2 t. red pepper flakes

2 T. ground cumin

2 t. ground allspices

1 t. ground cinnamon

4 sprigs fresh oregano

6 garlic cloves, cut in half

juice and zest of one orange

juice and zest of one lemon

1/2 c. white wine

Preheat the oven to 350. Trim the pork roast of large sections of fat. Cut the roast into 4 evenly-sized pieces. Pat them dry with a paper towel and season with salt and pepper. Heat the olive oil in a dutch oven (a large, oven-safe pot with a lid) over medium-high heat. Sear the pork pieces one at a time, for several minutes on each side until well-browned. Remove from the heat.

Place the pork pieces back in the pot. Sprinkle with the red pepper flakes, cumin, allspice, and cinnamon.

Tuck the oregano sprics and garlic between the pieces. Sprinkle the lemon and orange zest. Pour the lemon and orange juices and white wine over it all.

Cover the pot and bake for 2 1/2 hours. When the pork is very tender, take it out of the oven. Keep the lid on the pot and let the meat rest for at least 20 minutes.

Remove the lid and shred with two forks. Serve hot.

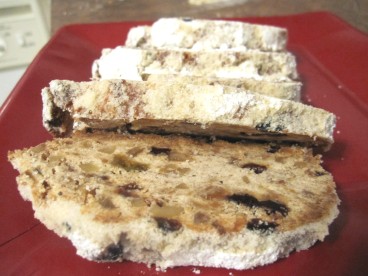
We’ve reached the end of the stollen story, and really, it’s pretty anticlimactic. After two days of resting, you sprinkle on about another 1/2 cup to a whole cup of powdered sugar, slice, serve, and enjoy. It isn’t the prettiest or most photogenic of holiday treats, but it istasty.

Moist and tender. Boozy and fruity. Sweet, but not too sweet. It really is a delicious holiday bread. But don’t just take my word for it…

Slate just published an article hailing Stollen as the best Christmas bread. The author, L.V. Anderson, begins the article: “There are certain things Germans do better than everyone else. Not incurring massive amounts of public debt is one of them. Christmas baking is another.” Public finance aside, the article even mentions Melissa Clark’s recipe from 2009, which is the recipe featured here.

Since I began this holiday baking over a week ago, I’ve been feeling a mix of emotions: anticipation as I shopped for the ingredients and soaked the fruit and nuts; excitement as I started mixing the bread; panic and frustration when it all went awry; fear that the bread wouldn’t rise at all after sitting in the refrigerator all night; hope that it would turn out ok; relief when it did; and finally, pride. I succeeded in making an edible, even delicious, holiday stollen. And I shared the experience with you.

I’m  headed home to Iowa Friday, where I’ll be for a few days and I plan to take the second loaf of Stollen home with me. Hopefully my family will enjoy it as much as I enjoyed the experience of making it.

I want to wish all of my readers, friends, and loved a very happy, restful, and tasty holiday season.