Feeds:
Posts
Comments

Archive for the ‘Vegetarian’ Category

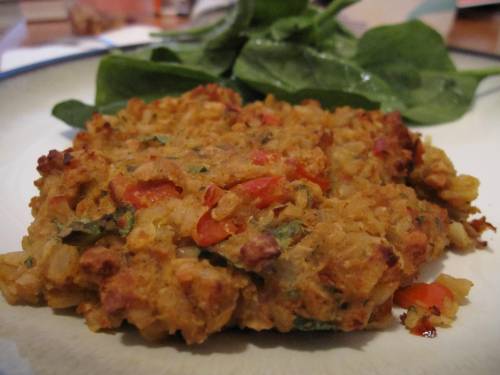
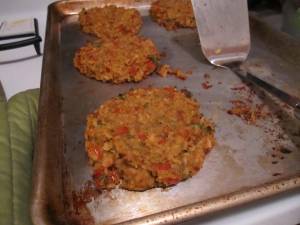
This is the second post of “burger” week – and these red lentil curried burgers are home more on a plate with some plain yogurt and lettuce than in a bun. These are definitely more flavorful than the spinach-tofu burgers, and consequently, aren’t a good match for traditional condiments. Like the other burgers, these require cooked brown rice, so keep that in mind when planning these burgers.

As you will notice, this recipe, like the last one, is from the cookbook, Moosewood Restaurant Cooking for Health. I love this book. Unlike some of the earlier books from the Moosewood collection, the ingredients are pared down somewhat (though it may not look that way form the ingredient list below). Everything is flavorful, the recipes are straightforward, and everything I’ve made so far has been tasty and healthful. The book contains all vegetarian and vegan recipes and is great for those wanting to learn more about cooking without or with less meat. I recommend it!

“Red Lentil Curried Burgers”, from Moosewood Restaurant Cooking for Health

1 c. dried red lentils

2 c. water

1/2 t. ground turmeric

1 1/2 c. chopped onions (about 1 medium)

3 garlic cloves, minced

2 T. olive oil

1/2 c. diced celery

1 c. diced red bell pepper

1 T. grated, peeled, ginger

1 T. curry powder

1/2 t. cinnamon

2 c. cooked brown rice

3/4 c. finely chopped roasted peanuts

1 T. lemon juice

1/2 c. finely chopped cilantro

Preheat oven to 400 degrees.

Rinse and drain the lentils. Put them in a small saucepan with the water and bring to a boil while stirring often. Add turmeric and 1/2 t. of the salt. Reduce the heat to low, cove, and simmer until lentils are soft and have absorbed the water. This will take about 20 minutes. Because red lentils can burn easily, make sure to reduce the heat to low and stir occasionally. If there is any liquid left and the lentils are fully cooked, drain the liquid.

While the lentils are cooking, heat the oil in a medium skillet over medium heat. Cook the onions and garlic until softened about 6 minutes. Stir in the celery and bell peppers. Cook for another 7 minutes. Reduce the heat and cover the pan, or add some water to prevent sticking, only if needed. Add the ginger, curry powder, cinnamon, rest of the salt, and cook for a minute, stirring constantly. Remove from the heat, add the rice, nuts, lemon juice, cilantro, and lentils. Mix well.

When mixture is cool enough to handle, shape into 6 patties using about 1/2 cup for each. Place on an oiled baking sheet and bake for about 20 minutes.
Read Full Post »

I’ve had a few cooking adventures in my blog “queue” for a while now… all for veggie burgers. I wanted to have a “burger week” prior to Memorial Day, a day when people eat burgers. A day when Americans eat burgers. A day when carnivores/ omnivores eat burgers. Then the move happened and new posts didn’t. So I thought about the next time people/Americans/carnivores/omnivores eat burgers and here we are, the week before July 4. While two of these vegetarian “burger” recipes I’m going to feature this week are not grill-appropriate, they are vegetarian appropriate and are tasty and would make an excellent addition to a July 4th menu.

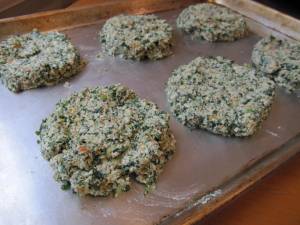
These spinach-tofu burgers are mild in flavor, making them an excellent backdrop for whatever toppings you want to use. They were good. Not as good as good or as flavorful as the black bean burgers I’ve made before, but still a tasty, healthful way to enjoy a burger. They were crispy on the outside, juicy on the inside, and tasted great on a bun with some lettuce and mustard.

Note that this burger requires cooked brown rice. So start that first if you don’t have any leftover. You can prep the rest of the ingredients while the rice cooks.

“Spinach-Tofu Burgers”, from Moosewood Restaurant Cooking for Health

Makes 6 burgers

10 oz. fresh spinach – or a 10 oz. package of frozen chopped spinach, thawed and well-drained

1 T. olive oil

1 c. chopped green onions

1/2 c. grated carrot (about 2 large carrots)

1/2 t. dried oregano

1 or 2 garlic cloves, minced

1/2 c. cooked brown rice

1 cake of firm tofu – about 14 oz.

1 t. dijon mustard

2 T. light miso

dash of ground black pepper

2 T. chopped fresh dill or basil

Preheat oven to 350 degrees.

If using fresh spinach, steam it and drain it well.

Heat the oil in a large saucepan over medium-high heat. Cook the green onions, carrots, oregano, and garlic until soft, 3 to 4 minutes.

In a food processor, pulse the walnuts and rice until crumbly. Transfer to a mixing bowl. Pulse half of the tofu and half of the drained spinach just until combined, but not gummy. Add that to the rice and walnut mixture. Pulse the rest of the spinach and tofu with the mustard, miso, pepper, and dill or basil, again, just until well mixed. Add to the bowl. Add the cooked green onion and carrot mixture. Mix well. Taste. Add more miso or salt or soy sauce for flavor if needed.

Begin shaping the mixture into 6 burgers using about 2/3 c. for each. Place on a lightly oiled baking sheet .

Bake for 35 minutes, until puffed and browned (see top picture).

Read Full Post »

I’m well into week four of living in my new apartment, with my new cohabitant and our CSA. I’m pleased to report all is going well…In addition to our weekly box o’ produce and bi-monthly mystery meat, our new neighbor also does a CSA, and shared some of her bounty with us last week, including fresh garlic, dill, and beets.

I’ve never talked about beets here before. This is probably because I’ve only made them once (aside from using them for coloring in pickled onions), and it was a couple of years ago. And I didn’t love them.

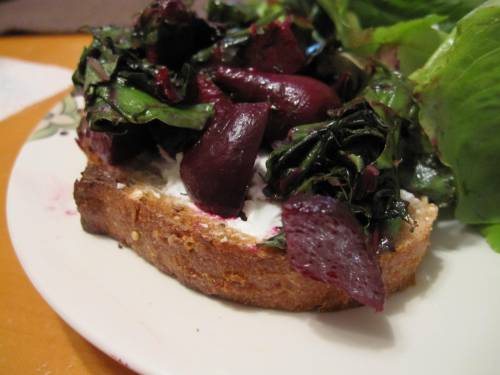
The beets from my neighbor however, were delicious. It was a single bunch of very small beets, each about the size of an egg, some were even smaller. I wanted to find a recipe that would showcase the beets, and also use dill, and be easy to prepare. A Google-search later and I found this recipe for “Dill Roasted Beet Goat Cheese Crostini.” That’s a complex name for a pretty straight-forward recipe. First, you roast beets. Then you melt butter and saute dill and add the beets. Then you toast some bread, top with goat cheese, and the beet/ dill mixture. What you have is a fresh, delicious way to eat beets. The goat cheese probably didn’t hurt things at all either.

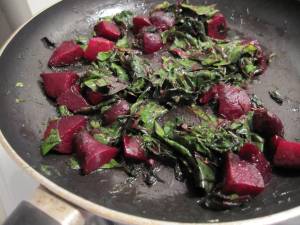
Because I had fewer beets than I remembered, I decided to saute the beet greens along with the butter and dill (and some salt and pepper), for my own spin on this delicious recipe. Now I hope we receive some beets of our own so I can make this again.

If you don’t think you like beets, try roasting them. And try smaller ones, if you can find them. These were so sweet and tasty, far from the larger ones that sort of taste like dirt I had before.

Here’s the recipe, adapted from Dill Roasted Beet Goat Cheese Crostini, by Farm to Food

Serves 2 for dinner

1 bunch of beets – (they are often sold in a bunch, or 3 large or 6 to 8 small beets, with their greens)

1 1/2 T. butter

1/4 c. chopped fresh dill

salt and pepper

4 slices whole grain  bread, toasted

2 oz. goat cheese

Preheat oven to 400.  Trim the greens from the beets and set aside. Wash and scrub the beets.  Wrap each beet individually in foil and place all foil-wrapped beets in one dish. If the beets are really small, you can wrap them all together. Bake for 40 minutes to an hour or until a sharp knife easily pierces the beet. 

While the beets cook, wash and chop the beet greens and the dill (if you haven’t already). Set aside.

Let the beets cool enough to handle.  Peel off the skin and trim any problem areas with a knife.  

Chop into 1/2 inch pieces and set aside.  Meanwhile, melt the butter in a large pan, toss in the dill and the beet greens and squeeze the lemon into the mixture.  Cook until the greens are wilted. Add some salt and pepper to taste.

Toss in the beets and mix well. Set aside while you prepare the toasts.

Spread the goat cheese on the toast. Top with the beet mixture.

Eat and [hopefully] enjoy.

Read Full Post »

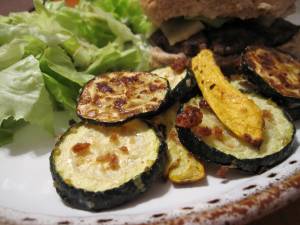
My mom used to deep fry zucchini when I was younger… or was it eggplant? It might have been eggplant actually, but I remember having fried zucchini and finding it wonderful. This zucchini isn’t deep fried. But sliced zucchini lightly coated in olive oil, garlic, salt, pepper, and bread crumbs, and cooked until crispy makes an easy, tasty, and mostly healthful side dish or snack. I thought the one medium-sized zucchini and yellow squash combined would make at least 3 servings, but Chris and I devoured them all, and were wanting more. Maybe we’ll receive more summer squash this week.

We’ve done really well with our latest bounty of CSA produce, and, as of Monday, used all of the veggies we received last Thursday. To atone for the zucchini and summer squash I could not use quickly enough last week, they were the first I wanted to use this week.

Using up some of our meat share from last week, I cooked the hamburger patties in a grill pan, and served them with salad greens and these zucchini crisps.

I also want to plug Elie Krieger, of the Food Network. I adapted this recipe from her’s for Zucchini Parmesan Crisps. This is only the second thing I’ve made from Ms. Krieger (in addition to refried beans). Both dishes have been easy to adapt, tasty, and not unhealthy. I plan to pay closer attention to her recipes on foodnetwork.com.

Here’s how I made the Zucchini (and summer squash) crisps, adapted from Elie Krieger’s recipe:

Makes about 2 servings

1 medium zucchini and 1 medium summer squash (or two of one or the other)

1 T. olive oil

1/4 c. freshly grated Parmesan

1/4 c. plain, fresh bread crumbs (or use dried)

1/8 t. salt

1/8 t. garlic salt

black pepper to taste

Preheat the oven to 450 degrees F.

Coat a baking sheet with cooking spray or lightly coat with olive oil

Slice the zucchini into thin rounds, about 1/4-inch thick. My summer squash was skinnier, so I cut this into quarters, lengthwise, then cut each of those in half. You could also cut this like you cut the zucchini, into thin rounds.

In a medium bowl, toss the zucchini with the oil. Add the Parmesan, bread crumbs, salt, garlic salt, and pepper.  Mix everything together. If using fresh bread crumbs, the zucchini will not be entirely coated, but they will be covered in the flavorful oil mix.

Place the zucchini in a single layer on the prepared baking pan.

Bake for 25 to 30 minutes, or until browned and beginning to crisp. Serve.

Read Full Post »

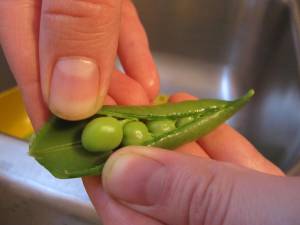
Between the move, hosting people for the holiday weekend, and cooking for 12 for Memorial Day, it has been a fun, if hectic time. On top of this, I received the the 3rd CSA this week, which included lettuce, Chinese cabbage, zucchini, green onions, broccoli, and… fresh peas! I’ve never cooked with fresh peas before and I was so excited to try them. Plus the meat share came this week and included ground beef, hamburger patties, and beef brats.

I had this dinner planned for a few days. Mint arrived in our CSA last week and I’ve been trying to figure out how to use it, besides mint juleps and mojitos (both of which would make excellent contenders). Amidst all of the craziness, we did have our first CSA-related casualty… we had to throw away two zuchini from last week’s share. We just could not consume them before they went soft.

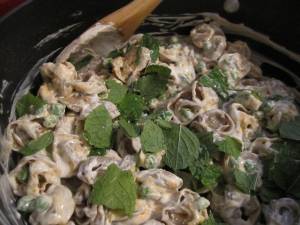
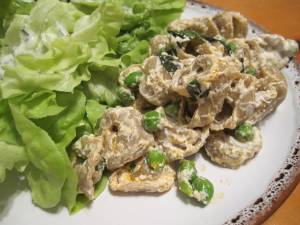
I wasn’t sure what to expect from the combination of smoked paprika, pasta, yogurt, and mint. It sounded simple, and I had everything on hand except the tortellini, so I decided to make it. I then chose to add the peas from this week’s CSA and cut back significantly on the amount of oil in the original recipe. The result was a simple, surprising, fast, and flavorful pasta dish that was ready in 10 minutes, not counting the time it took me to shell the peas beforehand. It was a little dry, which was not surprising at all since I cut the amount of oil, but the flavors were still there. It also felt like a nice accomplishment to use mint, peas, and lettuce, all from the CSA.

Tortellini with Yogurt, Mint, and Smoke Paprika Oil, Adapted from Radically Simple: Brilliant Flavors with Breathtaking Ease by Rozanne Gold, via this Serious Eats post.

1 lb. tortellini, I used mushroom tortellini from Lotsa Pasta

2 1/2 T. olive oil, divided

1/2 t. smoked paprika

1 large garlic clove, peeled and smashed

1 c. low-fat Greek yogurt, room temperature

Salt

1/3 c. mint leaves, torn

1 1/2 c. fresh, shelled peas (optional)

If using fresh peas, shell them first.

Bring a large pot of salted water to boil and cook the tortellini according to package instructions until al dente. Add the peas to the cooking pasta for the last 4 minutes of cooking.

Meanwhile, whisk together 2 tablespoons olive oil with paprika and garlic and set aside. Whisk 1/2  tablespoons of oil with yogurt and season to taste with salt.

When the tortellini and peas are done,  drain well. Add back to the pot. Add yogurt and paprika oil to the pot and stir. Top with mint. Season with salt and pepper to taste.

Serve.

Read Full Post »

Potato salad is a summer picnic staple, and it seems like there as many different kinds of salads as there are tastes. I’ve talked about my family’s potato salad and a different version I made for Memorial Day last year. I made another one this year. Actually, I initially made it to use up our CSA radishes last week, and made it again by request for a BBQ lunch I hosted this weekend. I did not use radishes the second time around. The CSA green onions also went into the salad.

Like the blue cheese potato salad from last year, this is different from the classic mayo-based version, but still has a traditional feel to it, thanks to the bit of mayo added to the yogurt dressing. It also gains extra flavor from roasting the potatoes, rather than boiling them. All of this results in a tangy, creamy, highly-flavored potato salad that makes a nice change from the usual.

Here’s what you do – adapted from “Roasted Radish and Potato Salad” from Food 52

The major changes I made include adding mayo to the yogurt dressing, using regular mustard seeds instead of black ones (could not find the black seeds), and omitting the radishes the second time I made the salad. If you omit the radishes, just add more potatoes.

Serves 2 to 3 – can be doubled at will

1 large Yukon gold potato, cut into bite sized pieces

8-10 radishes

Extra virgin olive oil

Sea salt

Freshly ground black pepper

1/2 teaspoon black or regular mustard seeds

1/2 teaspoon whole cumin seeds

1 tablespoon plain yogurt – I used low-fat Greek yogurt

1 tablespoon mayonnaise (could also use twice the yogurt and leave out the mayo)

2 tablespoons thinly sliced green onions

2 tablespoons lemon juice

1/2 teaspoon salt

1/2  teaspoon sugar

Mix the lemon juice with the salt and sugar in a small bowl until dissolved. Set aside.

Preheat oven to 400 degrees. Combine potatoes with a tablespoon or two of olive oil, sea salt, and a few grinds of black pepper in a large bowl. Toss evenly to coat. Transfer potatoes to a foil-lined baking sheet in a single layer. Roast 10 minutes.

While the potatoes are roasting, cut the radishes in half, or quarters for larger ones. Add radishes to the same bowl you mixed the potatoes, and also add a tablespoon or two of olive oil, some sea salt and pepper. Mix well.

Once the potatoes have roasted for 10 minutes, using a wooden spoon or spatula, gently push potatoes to one side of pan, trying to keep the skins in-tact. Add radishes in a single layer to the other side.

(Picture above is after the vegetables were done cooking and I mixed them around on the pan)

Continue to roast for another 10-15 minutes or until potatoes and radishes are tender. After about the first five minutes, take out the pan and turn everything or shake the pan.  Start checking after ten minutes to ensure everything doesn’t overcook.

Meanwhile, in a small skillet, heat 1 teaspoon of olive oil over medium heat. When hot, add the mustard and cumin seeds and stir with the oil. Cook for about a minute, until fragrant. Be careful, the mustard seeds will pop when heated. I used a splatter screen. You could also use a wooden spoon to shield the seeds. Remove pan from heat and set aside.

Mix together the yogurt, mayo, green onions, mustard and cumin seeds. Add one and a half teaspoons of the lemon/salt/sugar mixture. Taste the dressing. Add more lemon juice mix if you’d like. I added almost all of the mixture to the dressing.

When the potatoes and radishes are done, remove pan from oven and allow vegetables to cool slightly. Transfer roasted radishes and potatoes to a bowl. Add yogurt mixture. Fold to combine. Cover salad and refrigerate for at least an hour to allow flavors to develop. Bring salad to room temperature before serving.

Read Full Post »

Occasionally I find myself in cookbook ruts, kind of like food ruts. I only cook food from one cookbook for a long stretch of time, just like I might eat granola and yogurt for breakfast every day for two weeks and toast and an egg every day for the next two weeks.

This is my excuse for not cooking something from a birthday gift from my dear friends, Jon and Jess, earlier. Being the thoughtful friends they are, they gave me a beautiful cookbook by Deborah Madison called Local Flavors. The book is organized by produce by season and includes sections like: “Cabbages, Kale, and Other Crucifers;” “Vining Fruits and Vegetables;” and “Winter Fruits: Citrus and Subtropicals.” This organization will be helpful to me when I come home from the farmers market crazed about what to do with my newly purchased bounty.

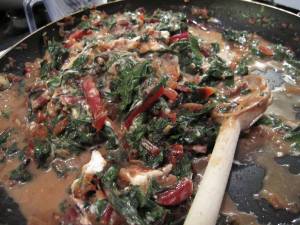
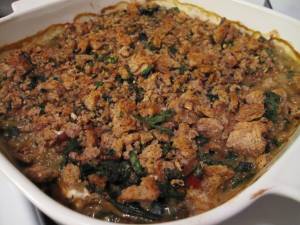
My first endeavor from my birthday gift was “Bright Lights Chard Gratin,” which calls for a brightly colored “rainbow chard” which I had never heard of nor seen. I used regular swiss chard instead. After washing and chopping the greens, sauteing the onion and garlic, I really wasn’t expecting anything outstanding, just a simple, healthful, and hopefully good dish. What I ended up with was a rather unattractive, very, very tasty dish that reheated well for leftovers. I was pleasantly surprised by the way all of the simple ingredients combined into something so wonderful. So here is the recipe from Deborah Madison, via Jon and Jess (thanks guys!)

“Bright Lights Chard Gratin” from Local Flavors by Deborah Madison

Serves 4 as a filling main dish, 6 as a side dish

2 lbs. chard, including half of the stems

4 T. unsalted butter

1 onion, finely chopped

salt and pepper

1 c. fresh bread crumbs

1 garlic clove, minced

3 T. chopped parsley

1 T. flour

1 c. milk or cream (I used 1% milk)

1 c. goat cheese, crumbled

Separate the leaves and chard stems. You can do this by stacking and aligning the leaves and cutting the stems off all at once. Wash the leaves in plenty of water. Chop them. Trim the stems and wash them well and drain them.

Melt half the butter in a wide skillet (or large pot) over medium heat. Add the onion and stems from the swiss chard. Cook stirring occasionally for about 20 minutes until the onion begins to brown a bit.

Add the chard leaves, sprinkle with 1 teaspoon of salt, and cook until wilted and tender, about 10 additionally minutes.

While the greens are cooking, preheat the oven to 400 degrees F. Lightly oil a 2-quart baking dish. Melt half the remaining butter (1 T.)  in a small skillet and add garlic, bread crumbs, and parsley. Cook for about a minute while stirring. Scrape the crumbs into a bowl and return the pan to the heat.

Melt the last tablespoon of butter in the small skillet. Stir in the flour and whisk in the milk. Simmer for five minutes and season with 1/2 t. salt.

Add the milk mixture to the chard mixture. Add the goat cheese. Taste the mixture and add more salt and/or pepper if needed.

Pour the mixture into the oiled baking dish and cover with the bread crumbs. Bake until heated through and golden on the top, about 25 minutes.

Let sit for a few minutes before serving.

Read Full Post »

Having just returned from the first day of the spring farmers market in Louisville, I went a little bit crazy. I didn’t go crazy at the farmers market though. I showed great restraint THERE and came home with only a head of green lettuce, two pounds of Kentucky bison stew meat, and a new ingredient – red spinach. As soon as I walked in the door of  my apartment, I began scouring my cookbooks and the internet for a suitable recipe to honor this beautiful and new-to-me vegetable.

I couldn’t just turn it into a salad (too easy), or dump it into a cheesy spinach lasagna (would cover up the spinach too much), or even just steam it (too boring). I wanted something unique! Something different! Something delicious! Something that would bring out the natural flavor of the red spinach.

I stacked up my most promising, veggie-centric cookbooks and began searching for the best recipe. I couldn’t just use my imagination, I needed THE ONE RECIPE.

This is something I recognize about myself – my inherent need to follow a recipe. I’m working on this and often tweak recipes as I go, but still. It was a little ridiculous. I finally realized how crazy I was… trying to find the perfect recipe that wasn’t too simple. I took a breathe, sat back, and cracked open my newest cookbook and turned to the salad section.

Yes – the salad section. I need to get over my need to always whip up a new, complex-ish dish. What more perfect method of using red spinach exists except by showcasing it in a salad? Maybe with a homemade dressing (to up the complexity-factor a bit).

I had been eyeing Melissa Clark’s cookbook In the Kitchen with a Good Appetite for a while before buying it at a sad, going-out-of-business sale at Borders. This book is full of delectable-sounding recipes and I wanted to make most everything right away. Since buying it one and half weeks ago, I’ve already made 4 things with plans to make a 5th this week.

Most of the recipes are accompanied by essays, and I particularly enjoyed the one about salad. It was all about using more than just bagged salad and bottled dressing to create something equally easy and much more interesting and less expensive. Well, maybe not equally easy. You do have to wash the lettuce, and mix the dressing together. But really, it isn’t too difficult. One of the recipes included is for spinach dressed with a zippy mustard and garlic dressing. It sounded easy, and delicious. And made me excited to make the salad.

After filling my newly-cleaned sink with cold water, I washed the spinach in two changes of water. This allows all the dirt and sediment clinging to the spinach to fall to the bottom of the sink. I then dried it in my salad spinner – which has been a great, if a space-hogging, addition to my kitchen. I then used an almost empty jar of dijon mustard to mix up the dressing (a technique I learned from the Amateur Gourmet, who learned it from Dorie Greenspan). It’s a great, easy way to use up the last of the mustard in the jar, and to create a reusable salad dressing container.

To make a long story short, all of this fretting turned into a salad I craved. A salad I was excited to eat. I hope you’ll try it too.

And the red spinach? Well it was delicious. Sweeter than regular spinach and perfectly complimented by the tangy, garlicky dressing. Not a bad way to showcase a vegetable experiment, even I did rely on a recipe.

“Spinach and Avocado Salad with Garlic Mustard Vinaigrette” from In the Kitchen with a Good Appetite by Melissa Clark

dressing makes at least 4 servings (will keep in an old mustard jar, or other container, in the refrigerator for a while – at least a few weeks)

2 garlic cloves

a pinch of kosher salt, more to taste

juice from one half of a lemon

1 t. dijon mustard (I used what was left in the jar)

4 T. extra virgin olive oil

about 6 cups  spinach leaves (or other dark greens, like arugula) (enough for 2 to 4 salads)

1/2 avocado, cut into cubes

Using a heavy knife (or a mortar and pestle if you have one), mince the garlic together with a pinch of salt until a paste forms. Use the side of the knife to smear and mash the garlic once it is minced. Scrape the paste into the mustard jar (or a small bowl). Whisk in the lemon juice, mustard, and another pinch of salt. Screw the cap on the jar and shake until the salt is dissolved (or use a whisk). Then either whisk in the oil or add it to the jar and shake again.

Place the avocado and spinach in a large bowl, add the amount of dressing you want and toss. Add additional salt and lemon juice if needed.


Read Full Post »

cauliflower mac

The last few months (since the holidays, really) I’ve been trying to eat less and exercise more. I’ve avoided making this the focus of my blog – but I feel some explanation is necessary with this post.

I love macaroni and cheese, as can be surmised by the 4 iterations of it on this blog, five including this one.

Here they are:

resurrection mac and cheese

spicy mac and cheese

cheese pasta with pumpkin and pancetta

simple stove-top mac and cheese

While I’m a firm believer in eating whatever you want in moderation, sometimes having real, full-fat-oh-so-delicious macaroni and cheese is just too much temptation to handle. So when the craving for macaroni and cheese struck recently, I remembered this recipe from Mark Bittman.

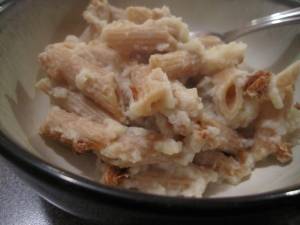
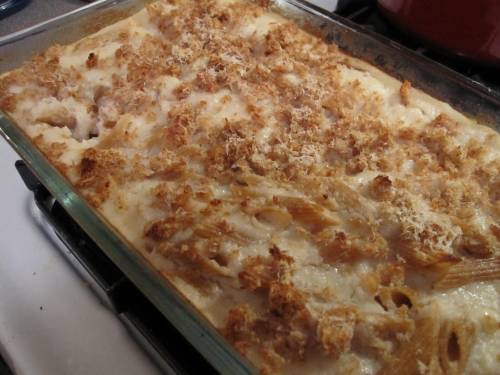
This version of mac and cheese relies on mashed cauliflower, mustard, stock, and spices to flavor the pasta, and just a touch of cheese to add additional flavor and creaminess. The pureed or mashed cauliflower mimics a creamier, fattier cheese sauce. “Mimics” is the key word here. While I enjoyed this pasta and found it pretty tasty, it wasn’t terribly filling and was definitely missing a “satisfying” quality. I suppose this might have come from more cheese, or cream, or another source of fatty protein. It was good, but I’m not sure I would make it again. I think I’d rather eat a little less of the real thing, if I could control myself.

“Creamy Cauliflower Mac” from The Food Matters Cookbook, by Mark Bittman

1 T. olive oil, plus more for greasing the baking dish

salt

2 1/2 c. vegetable or chicken stock

2 bay leaves

1 cauliflower, cored and separated into large pieces

8 oz. penne, or other  whole wheat pasta (like shells, ziti, or elbow)

1/2 c. grated Cheddar cheese or Gruyere, or another good melting cheese of your choice

1 T. Dijon mustard

1/8 t. nutmeg

black pepper

1/4 c. grated Parmesan cheese

1/2 c. or more of bread crumbs

Heat oven to 400 degrees. Grease a 9-in square baking dish (or similar size) with a little oil. Bring a large pot of water to a boil and salt it.

While the water is coming to a boil, put the stock with the bay leaves in a small saucepan over medium-low heat. When small bubbles start to appear on the sides (after about 5 minutes on the heat), turn off the heat and let stand.

When the water has started boiling, add the cauliflower and cook until very tender, about 20 to 25 minutes. Scoop the cauliflower out of the water with a slotted spoon and translate to a blender, food processor, or a bowl. Add the pasta to the boiling water and cook until not yet edible and still a little chalky inside, about 5 minutes. Drain the pasta and rinse quickly with cold water to stop the cooking. Put the pasta in the greased baking dish.

Remove the bay leaves from the stock. Carefully process the cauliflower with 2 cups of the stock, 1 tablespoon of oil, cheese, mustard, nutmeg, and a dash of salt and pepper. If the sauce seems too thick, add another 1/2 c. of stock. Taste and add more salt and pepper if necessary.

Pour the sauce over the pasta and toss carefully. Spread in the dish evenly. Sprinkle the Parmesan cheese and bread crumbs over the top. Bake until bubbling and browned, 15 to 20 minutes.

Note: If you don’t have a food processor or blender, you can mash everything together in a large bowl using a potato  masher. It will be less creamy – but will still work.

Read Full Post »

I have a mixed history with sweet potatoes. I don’t remember eating them much growing up – except at Thanksgiving when they were steamed, sliced, and fried in nothing but butter and brown sugar. The responsibility of cooking the “sweets” usually fell to my uncle or dad. They are the two not afraid to use as much butter as necessary to appropriately create a thick, sweet, buttery syrup.

My next introduction to sweet potatoes was probably sweet potato fries. And curried sweet potato soup. Then in Chicago, I had my first sweet potato in a vaguely-Mexican-American-style dish. My sister took me to an unappetizingly named cafe in Chicago called Earwax. This was several years ago, and I don’t remember the exact components of the dish I ordered, but I know it contained black beans, mashed sweet potatoes, and was topped with pesto – maybe cilantro pesto? I was so excited for what sounded like a promising, delicious lunch. It turned out to be a bland mess badly in need of a little bit of salt, at least.

Despite this disappointing lunch – I remained intrigued and hopeful about a successful combination of sweet potatoes and black beans.

Since then, I’ve made black bean and sweet potato stir-fries with quinoa, a couple different kinds of black bean and sweet potato burritos (one of which my dear brother and dad declared inedible), but I had not yet tried another incarnation of the sweet potato and black bean quesadilla. Until last week.

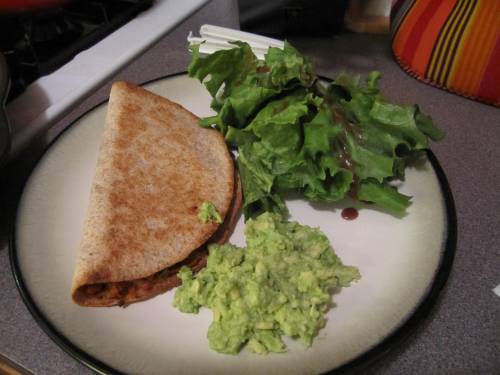
Last week I wanted the sweet, earthy, spicy combination of sweet potatoes and black beans with salty, creamy cheese. So I turned to a recipe I had found in one of my library cookbooks, Moosewood Restaurant Cooks at Home. But I wanted more protein than just sweet potatoes and a little cheese, so I decided to add a can of beans to the mix. Thinking I had black beans on hand, I came home from the grocery to find kidney beans instead. So instead of recreating a spiced-up version of the black bean and sweet potato quesadilla at the cafe-that-will-not-be-grossly-named-again, I made a perfectly satisfying and tasty kidney bean version. Much spicier, much more flavorful, with just the right amount of salt, minus the Wicker Park pretense.

Here’s what you do, adapted from “Sweet Potato Quesadillas” from Moosewood Restaurant Cooks at Home.

Makes 3 over-stuffed quesadillas

1/2 of a medium onion, chopped

2 garlic cloves, minced

1 T. vegetable oil

1 large sweet potato, grated

1/4 t. dried oregano

1/2 t. chili powder

1 t. grown cumin

generous pinch of cayenne

1 15 oz. can of beans (kidney, black, or other), rinsed and drained well

salt and pepper

cheese of your choice – Cheddar or Monterrey Jack would be good choices

Tortillas – I used medium, whole-wheat tortillas.

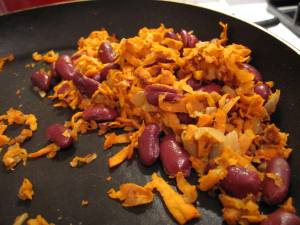
Saute the onions and garlic in the vegetable oil  over medium heat, just until onions are translucent. Add the grated sweet potatoes, oregano, chili powder, cumin, and cayenne and cook, covered, for about 10 minutes. Stir frequently to prevent the mixture from sticking.
When the potatoes are tender, and the beans, salt and pepper, and cook until the beans are heated through.

Meanwhile, preheat the oven to 350. lay the tortillas out on a baking sheet. Divide the filling between the three tortillas – keeping it on one half. Sprinkle with cheese. Fold the tortillas in half and bake for 10 – 15 minutes, until browned and heated through.

Note: You can also cook these in a skillet on the stove top – or even pop in the microwave just to quickly melt the cheese. However, cooking these in the oven, especially using whole wheat tortillas, results in a flaky, crispy, final dish. Try it. It also requires no extra oil – as the stove-top method would.

Serve with guacamole, salsa, and/ or sour cream… these are quesadillas. Be creative and do whatever suits your tastes.
An easy guacamole that tastes great with an assertive dish like this, is just a perfectly ripe, mashed avocado with a little salt and lime juice stirred in.

Read Full Post »

« Newer Posts - Older Posts »